Appliance not working? Try one of these simple fixes before you call the repair service
At least a quarter of all appliance repair calls are resolved with no-brainer solutions like pushing a button or flipping a circuit breaker. Learn what to look for and how to avoid these expensive lessons.
Lights
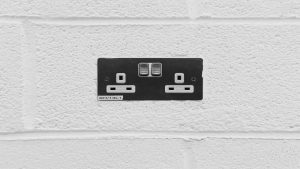
Hit the reset button
If the circuit breaker hasn’t tripped, look for a GFCI.
When a light goes out or a switch doesn’t work, you should first check the main electrical panel for a tripped circuit breaker. But don’t stop there. Before you change out light bulbs and switches, see if a GFCI outlet (which may be upstream from the troubled light or outlet) has tripped. Sometimes all the bathrooms or the outside lights are powered through a single GFCI located in one bathroom or elsewhere, such as in a basement. Simply push the reset button on the GFCI and you could be back in business.
Refrigerator
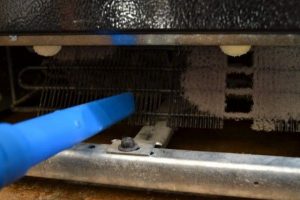
Clogged coils
Clean the coils if your refrigerator isn’t cooling or conks out
If your refrigerator conks out on a hot day and you have a cat or a dog, immediately check the coils for pet hair. Service pros find this problem on half of their refrigerator calls. The coils are the black tube-and-wire grid that cools the fluid in the compressor. A buildup of hair will cause the compressor to overheat and trigger the overload switch. On many fridges, you get to the coils by opening the grille at the bottom of the refrigerator. Then push a coil cleaning brush (sold at home centers) into the coils, pull it back and vacuum it clean.
If the coils are located on the back, pull out your fridge (it’s often on rollers) and brush them off. Bonus: The clean coils will cool more efficiently and save you money on your utility bill!
Once the overload switch is tripped, you may have to wait a few hours for it to cool. It will reset itself and turn the refrigerator back on.
Gas stove

Clean the igniter
Spread the burner prongs a little to create a better electrical connection.
If your stove burner won’t come on, the likely culprit is the spaghetti sauce that boiled over a few days ago. Use a toothbrush to clean off food spills from the igniter. On an electronic ignition stove, it’s a little ceramic nub located either on the stovetop or under the ceramic seal strike plate. Also make sure that the round ceramic seal strike plate is properly seated on the burner.
Electric range
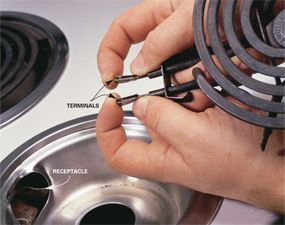
Burner prong problem
If the burner won’t light, try cleaning the igniter.
If your electric stove burner won’t heat, turn the burner off and pull it out from its socket. Then plug it in again and wiggle it around. If it feels loose, remove the burner again and gently bend the burner prongs slightly outward for a tighter connection. Easy does it. You could end up pushing the whole socket out of its bracket.
Electronic oven controls
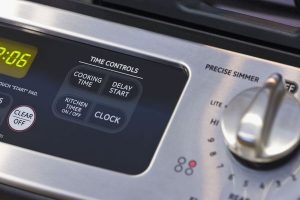
Programming snafu
Oven won’t heat? Check the clock and the timer setting. It doesn’t always do what you think you told it to do.
Blame it on the technology. It so happens that if you set the “time cook” function, the oven, much like a programmed VCR, won’t turn on until the appointed time. You may have done this inadvertently, but if your digital display reads “hold,” “delay” or “time cook,” then the timer is engaged. You’ll have to clear it first by pushing the “off” button. On ovens with dials, be sure the knob is turned to “manual.”
Washer
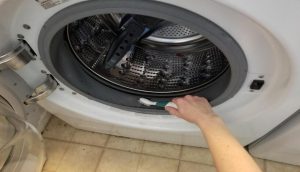
Level the front
Quiet a noisy washer by leveling it.
When a washing machine cabinet rocks, it makes a horrible racket during the spin cycle. The solution is to simply readjust the legs. Screw the front legs up or down until the cabinet is level. When both legs are solid on the floor, tighten each leg’s locking nut. In most washers, to adjust the rear legs, gently tilt the machine forward and gently lower it down. The movement will self-adjust the rear legs.
Dryer
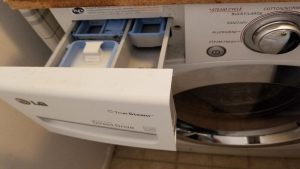
Wrong setting?
Before calling the repairman, check the dryer settings—just in case.
Our expert repairman responds to many “dryer-not- heating calls” only to find that the machine is set to “fluff air”—a non-heat setting. Avoid the embarrassment. Check the settings first.
Another common cause of poor drying is a clogged lint filter. The filter may look clean, but it may actually be covered by a nearly invisible film caused by dryer sheets. This film reduces airflow and forces the thermostat to shut off the heat before your clothes are dry. Test your filter by pouring water into it. If the filter holds water, it’s past time to clean it. Pull out the filter and scrub it in hot water with a little laundry detergent and a stiff kitchen brush.
Also check the outside dryer vent for any lint that may have built up there. The louver door–style vent covers are notorious for lint buildup, which traps heat and turns the heat off in the dryer. Pull the cover completely off to get to these clogs.
Air conditioner
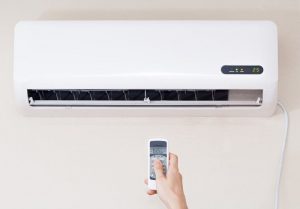
Check the fuses
If your AC won’t come on, the thermostat may be saying no.
If you turn your central air conditioner on, off and then on again in rapid order, chances are you’ll blow a fuse or shut off a circuit breaker or the air conditioner simply won’t respond. That’s because the compressor (in the outdoor condensing unit) may have stopped in a high compression mode, making it difficult to start until the compression releases. Older condensing units may switch the compressor on anyway, which causes the circuit to overload and blow a fuse. Newer, “smarter” condensing units will prevent this blunder by delaying the AC’s “on” function for a few minutes. It’s easy to mistake this delay with a faulty air conditioner. Be patient and give the air conditioner about five minutes to come back on.
To determine if you have a blown fuse, locate the special fuse block near the outside unit. Pull out the block and take the whole thing to the hardware store. A salesperson can test the cartridge fuses and tell you if you need to replace them.
Another simple reason your AC might not come on: You’ve signed up for a cost discount with your electric company in exchange for limited air conditioning during high-demand periods, and you’re in an “off” period. If you can’t remember, call your electric company to find out. You don’t want to pay the repair technician to drive out and explain this program to you!
Dishwasher
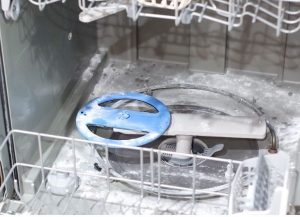
Clean out debris
Clean the filter and float switch if the dishes don’t come out clean.
When your dishwasher no longer gets your dishes clean, a food-filled filter is most often to blame. If it’s clogged, water can’t make it to the spray arms to clean the dishes in the top rack. The fix takes two minutes. Simply pull out the lower rack and remove the filter cover inside the dishwasher. (Check your owner’s manual if you can’t spot the filter.) Then use a wet vacuum to clean off the screen.
While you’re there, slide the nearby float switch up and down. If it’s jammed with mac and cheese, you won’t get any water. If the cover sticks, jiggle it up and down and clean it with water.
Required Tools for this Project
Have the necessary tools for this DIY project lined up before you start—you’ll save time and frustration.
- 4-in-1 screwdriver
- Adjustable wrench
- Allen wrench
- Level
- Shop vacuum
You’ll also need a coil cleaning brush, an old toothbrush and a needle.
